5 Things you need to know about your screed before refurbishing your floors
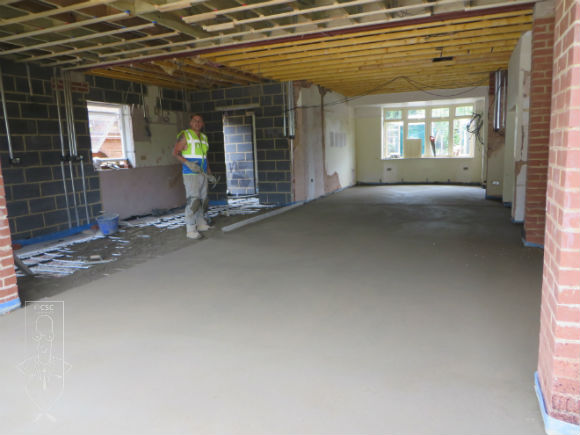
Once your old floors are stripped of their floor covering, it is important to make a thorough assessment of the remaining substrate to make sure it is in a suitable condition to take on the new flooring. Some of the basic aspects that need to be looked at before laying the new floor finish are:
1. Is the existing screed strong enough to take on the new flooring?
When installing a new floor, the quality and suitability of the existing screed should be assessed adequately to make sure they can be retained for continued service. Start by checking the screed for any detachment, cracking or curling considering their potential effect on the new floor. Though minor cracks can be repaired by resin injections, further intervention might be necessary for cracks or joints where stabilization is not possible.
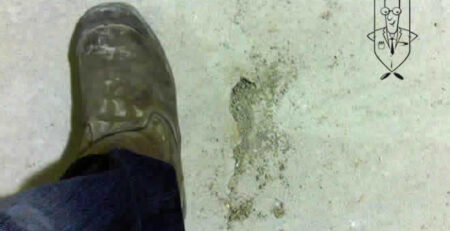
If the screed looks friable and weak, it is advisable to carry out a BRE drop hammer test to gauge if the screed is sound enough for the new overlay. Especially in cases where the traffic volume of the new floor is estimated to increase, it is important not to rely on the past satisfactory performance of the floor alone, but make a thorough assessment to determine its suitability for the new floor.
2. How flat is the screed?
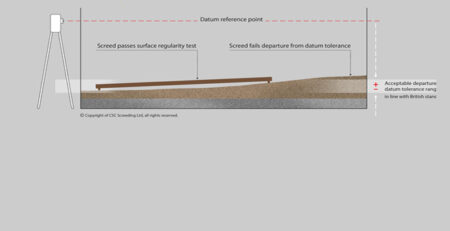
Surface regularity or the level of flatness of the existing screed reflects clearly through the final floor finish. According to British Standards a normal accuracy floor is only allowed a maximum deviation of 5mm when measured with a 2m straightedge resting in contact with the floor/screed.
In the case of high standard floors (SR1) the deviation should be limited to 3mm, whereas for utility standard floors (SR3) it can go up to a maximum of 10mm. Deviations higher than this can affect the serviceability of the floor and can lead to quicker wear and tear, and in severe cases even pose trip hazards. If your floor base or screed does not meet the requirement, further screeding/levelling will be necessary that is commensurate with the thickness specified for the new floor covering.
3. Contaminants and hazardous material
If the building you are refurbishing was previously used for industrial or laboratory purposes there are chances that there could be residues of chemical contaminants and harmful materials in the screed and floor bases. In such cases make sure the screed or floor base is assessed for the presence of contaminants and take necessary steps to remove them before commencing further work.
In the case of non-industrial buildings, the contaminants that are likely to be present are oils or materials such as dust proofers or sealers which were applied earlier to concrete wearing surfaces. These materials can affect the bond with the overlaid adhesives and new floor covering, and should be removed or isolated from the new flooring. Other materials that need attention are residues from magnesium oxy chloride flooring (the chloride can cause corrosion of steel reinforcement in concrete bases), asbestos and chemical or biological contaminants from industrial processes or laboratories.
4. Moisture can spell trouble
Most floors laid over ground-bearing bases are constructed with a moisture barrier to isolate them from groundwater. When it comes to refurbishing your floors, make sure the floors have an adequate waterproofing system, and in cases where a moisture barrier is present, ensure that it is in good working order. Flaws in moisture proofing might sometimes go undetected if the floor finish used earlier was a porous finish such as stone, terrazzo or ceramic tile. But if the flooring is replaced with moisture sensitive floor finish such as vinyl, timber or linoleum, the flooring can be at risk of potential failure.
In situations where there is any doubt about the effectiveness of the moisture system, it is important to carry out further investigation and monitor the condition of the base using a reliable moisture content test. Where necessary, the floor base should be isolated from the rest of the flooring by incorporating a Damp Proof Membrane and a layer of screed in between.
5. Time matters
If your floors are in need of a new layer of screed, make sure you choose a screed that suits your project timeline. A typical traditional screed requires a good drying time of 110 days, before you can lay the floor finish. Laying the screed any sooner can lead to the residual moisture being trapped within the screed, triggering off major flooring problems after you lay the floor finish. The moisture (and the alkaline residues it takes with it from the screed) can cause moisture sensitive floor finishes to de-bond due to softening of adhesives; cause buckling and lifting off hard wood floors and damp and mold problems in carpets.
If you are on a tight schedule, it is best to go for a proprietary/ modified screed that can take on the final floor finish in a few days to a few weeks. These screeds generally use water reducing or plasticizing admixtures or special cements to reduce the dry out time while improving the screed strength and soundness. Speak to your installer to help decide on a screeding system that is suitable for your project and your budget.
[cta]


